This article will will explain how to show multiple electrical connections for the same family in your Revit schedule.

Revit Schedules are notorious for being difficult to use and the problem discussed in this article is one of the reasons Revit is called difficult to use in the first place. It all boils down to Revit only allowing each family to have 1 row of data. If you try to squeeze all of the electrical data for multiple electrical connections into the same family then you better be ready to only use 1 row in a Revit schedule because that is all you get in Revit for only one family. That means you will have to create a whole 2nd set of electrical shared parameters like Volts 2/Amps 2/etc. and that adds quite a bit of complexity when you only need it for a handful of families. It also makes your schedules extra-wide which makes them even harder to fit on sheets, a problem that designers know about all too well.
This issue is not a rare one either, there are many situations where a single piece of foodservice equipment needs to have more than one electrical connection. One of the most common is the double-stacked oven which happens to be one of the most popular pieces of foodservice equipment on the planet.
The solution we are going to describe is not a secret, it is already widely used, the method involves using another family and nested it into our main family as a Shared nested family with an additional set of electrical shared parameters. The best part about this method is that is allows you to keep using the same shared parameters which in our case are the FCSI Shared Parameters aka the Foodservice Industry Shared Parameters. In Revit, one family is one row of data and one row of data means one set of shared parameters and the FCSI Shared Parameters do not include a second set of parameters for additional connections so this method of using Shared nested families is 100% compatible with the existing FCSI Shared Parameters.

So what does this look like in practice, well here is a shelving unit by my good friends at Metro. Metro just released a hot heated shelf, it comes with a cord and plug for each individual shelf and each shelf requires its own 120V plug connection with 200W-800W loads depending on shelf size. For this article we are going to focus on the 24"x48" size which is 600W and 5 amps. Let's see what this would look like with 1 hot holding shelf, 2 hot holding shelves, 3 hot holding shelves, 4 hot holding shelves, 5 hot holding shelves, and finally 6 hot holding shelves. As we progress through the additional electrical connections you will see that using a Shared nested family is a great way of keeping everything clean and simple to read while also keeping it organized.
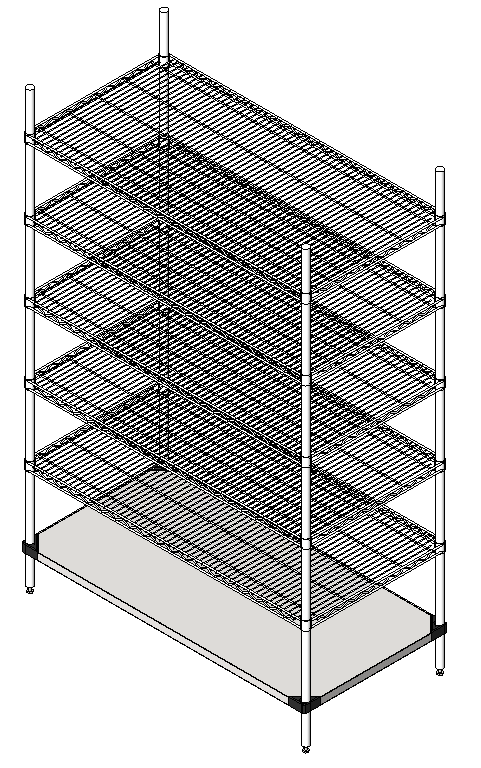
First up, 1 heated shelf. Since this only requires 1 set of electrical parameters, we will just place those electrical shared parameters in the main shelving unit family and our nested family will be Not Shared. The reason we want it to be Not Shared is because otherwise we would have 2 rows in our equipment schedule for this single hot holding shelving unit and space in our electrical schedules is precious, and no that isn't a joke. Ok before we move on I want to point out some of the electrical requirements for our heated shelf. The amperage is 5 amps for the 24"x48" size which means that on a typical 20 amp circuit we are only able to get (3) 24"x48"shelves.
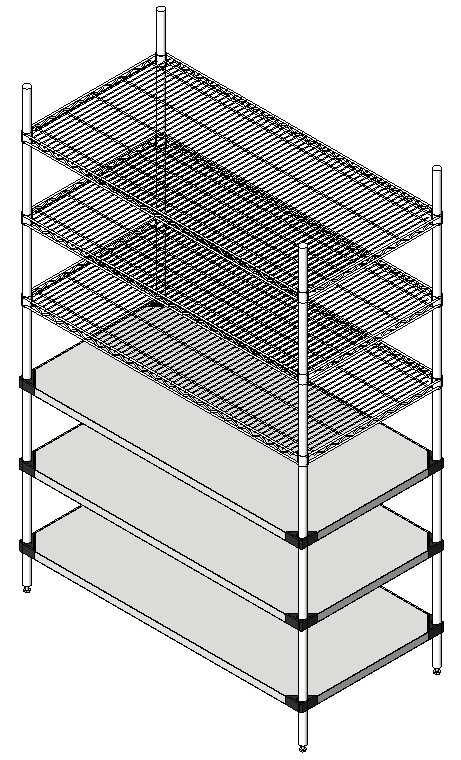
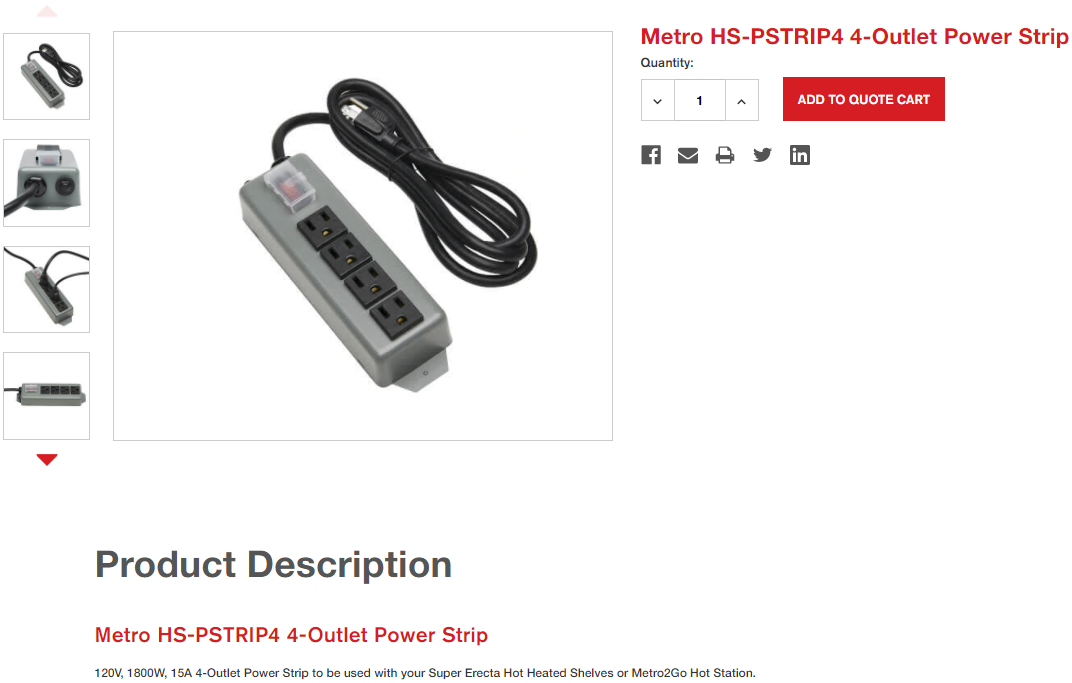
Lucky for us Metro does off this 4-outlet 1800W/15amp Power Strip. As long as we added this power strip as an accessory to our shelving unit, we could add (3) 24"x48" heated shelves to our setup and only add (1) electrical connection for 120volts, 1 phase, 15amps, 1.8kw, Cord & Plug, NEMA 5-15P.

That would be one method of showing the electrical requirements for this family and that method would certainly be considered a fine way of showing the requirements for the shelving unit.
Now what happens if you need more hot heated shelves, say 6 heated shelves.
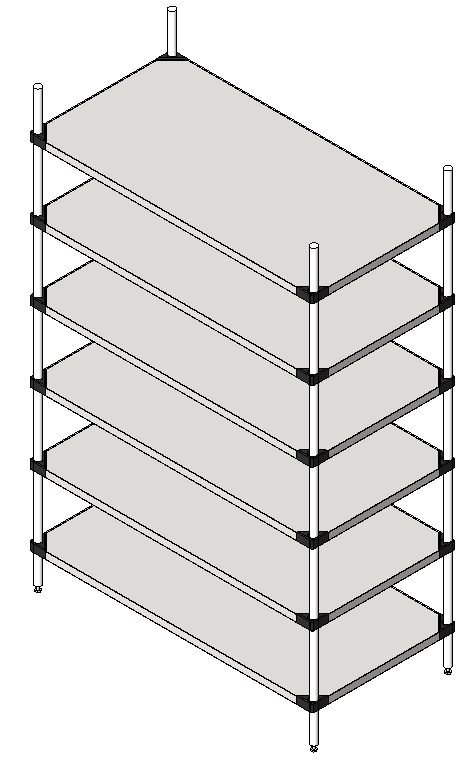
Well before we talk Revit, let's talk electrical engineering. (6) 600W shelves would be 3600W or 30 amps. 30 amps is not longer a common plug. So instead of a single power strip, what we will do is split the shelves up into 2 sets and use two of the Metro HS-PSTRIP4 4-outlet 1800W/15amp power strips.

So that's what we show in Revit, and we don't need to show all of the individual hot heated shelves, unless we want to of course, but the example above is a simple way of showing an "Additional Electrical Connection" using a Shared nested family.
The key here is that the nested family must be Shared, and if you don't know what I mean by that it is a Revit setting that you can find here:
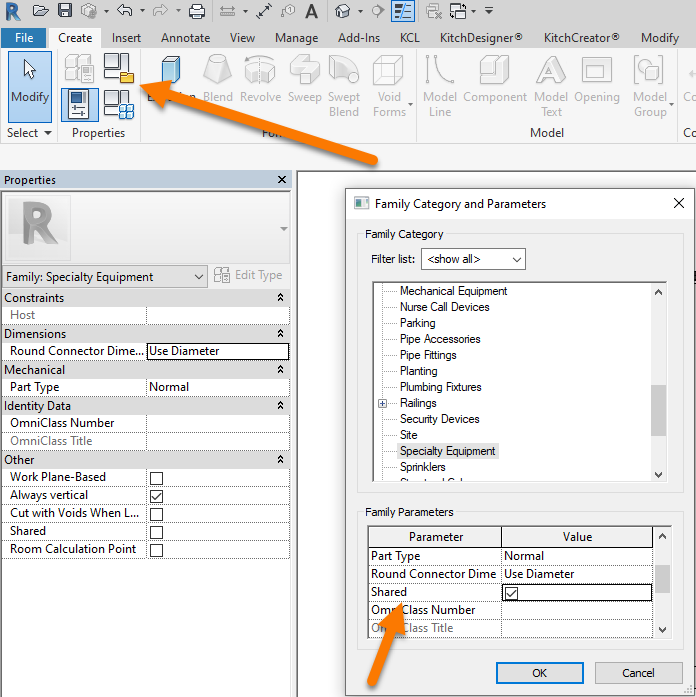
When using Shared nested families, and when dealing with Revit schedules in general, i always recommend everybody uses a simple yes/no checkbox based method of filtering families out of your schedules, here is a link to learn more about schedule filtering: https://support.kitchautomation.com/knowledge/settings-electrical#filterings-schedules-with-project-parameters
