
The Advance Tabco Create Dishtable Tool is used to create itemized AIA-formatted written specifications and accessorized Revit Families based on the options and accessories selected.
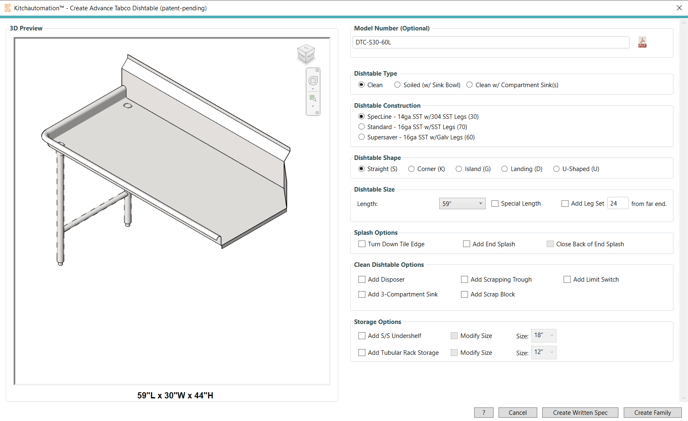
Table of Contents
- Installing Advance Tabco Revit Toolbar
- Initialization
2.1 - Model Number (Optional)
2.2 - Select Family Style
2.3 - Select Dishwasher Location - Using the Create Dishtable Configurator
3.1 - Dishtable Type
3.2 - Dishtable Construction
3.3 - Dishtable Shape
3.4 - Dishtable Size
3.5 - Splash Options
3.6 - Clean Dishtable Options
3.7 - Soiled Dishtable Options
3.8 - Disposer Options
3.9 - 3-Compartment Sink Options
3.10 - Island/Landing/U-Shaped Options
3.11 - Storage Options
1. Installing Advance Tabco Revit Toolbar
To request access to this tool click here and fill out the form. Once access has been granted you will receive a Product Key to insert into the License Manager.
Once you receive the Advance Tabco setup file, close Revit and start downloading.
There are two identical versions of this tool, one version only contains the Create Dishtable tool and the other version contains all KitchDesigner and KitchCreator tools including the Create Dishtable tool.
If you downloaded the version from the Advance Tabco website then you will receive the Advance Tabco Revit Tools version shown in the images below.
If you downloaded KitchDesigner/KitchCreator then the installation process will look like it does in this article: How Do I Install KitchDesigner...
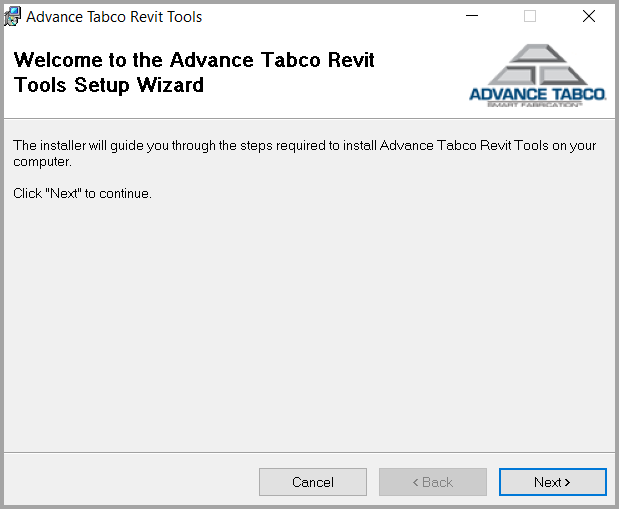
Click "Next"

Read the License Agreement, select "I Agree". Click "Next"

Select which versions of Revit you would like the Advance Tabco toolbar installed. Click "Next"
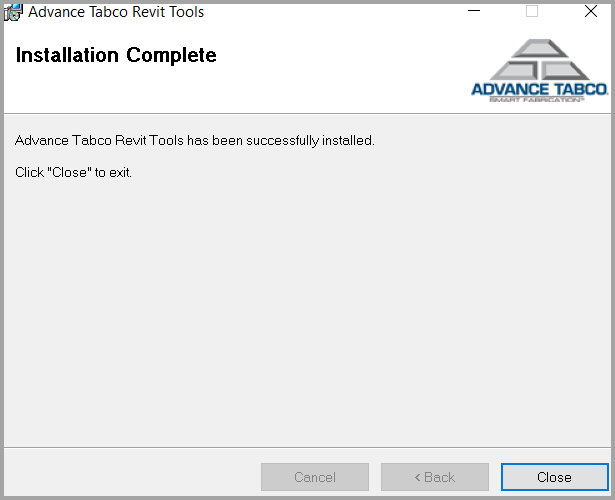
Once Installation in complete click "Close".

Start Revit. Select to open an new or existing project. You will see the Advance Tabco on your Revit banner.
Make sure you have requested access from Advance Tabco by clicking here and once you receive your Product Key you can activate the tool.

Open the License Manager and click Activate, then paste in Product Key and click OK. The tool will be activate and ready to use.
2. Initialization

When you launch the Create Dishtable tool you will be taken to this window.
2.1 - Model Number (optional)

The Model Number text box can be used to quickly set the configurator to Advance Tabco catalog model numbers.
This is not required so you can continue without setting a Model Number and the configurator will automatically select the Model Number based on your inputs.
The PDF button can be used to open the cutsheet for the active model number.
2.2 - Select Family Style

-
3D Geometry Only (faster) - Use this option if you are controlling Transparency in Revit without using 2D symbolic lines. Each 3D element will be set to a subcategory which can be used to control the line styles.
-
3D Geometry & 2D Outlines (Built to FCSI Revit 2015 Standards) - Use this option if you are controlling Transparency in Revit by turning 3D geometry off in Plan view and tracing the equipment with 2D symbolic lines. This method conforms to the standards set in the 2015 FCSI Revit Standards.
2.3 - Select Dishwasher Location
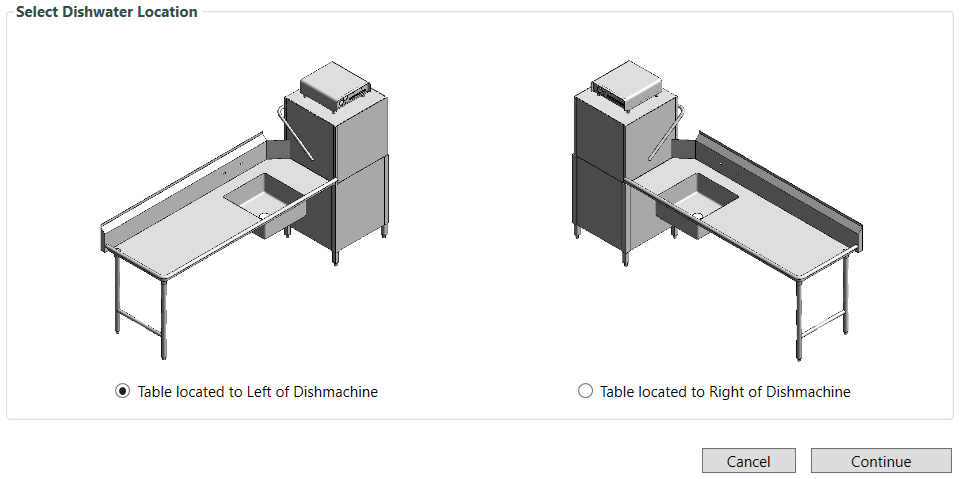
Next is where you select the dishwasher location.
This is done automatically if you select a Model Number.
Finally click Continue to start the configurator.
3. Using the Create Dishtable Configurator
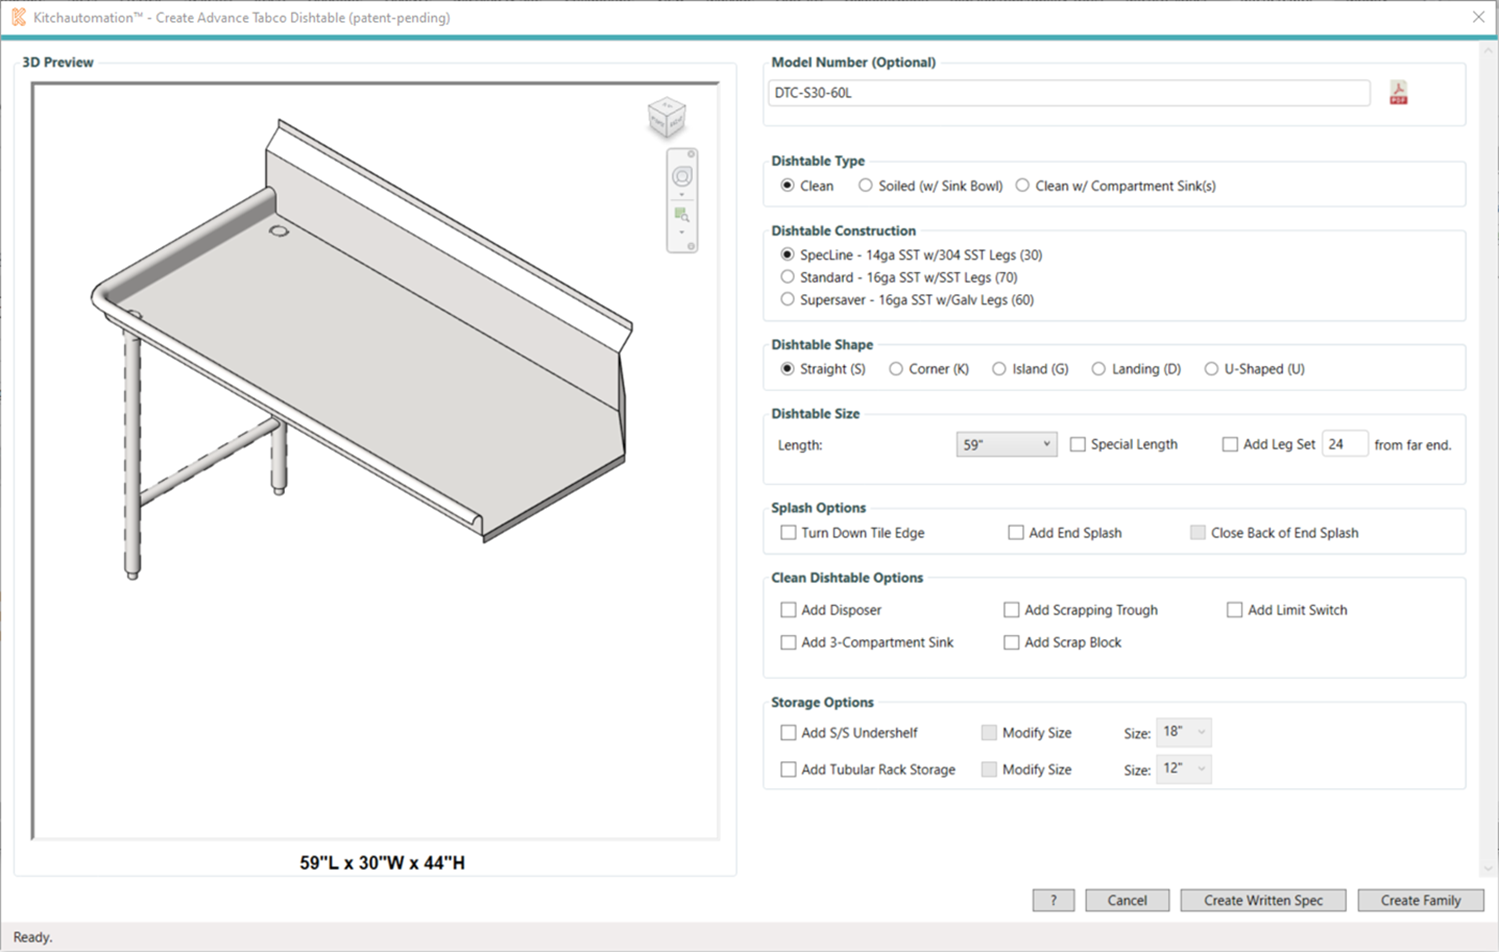
Live 3D Preview:
On the left side of the configurator is a live 3D preview. This is a native Revit preview which means you can use the ViewCube in the top right corner and you can use the mouse wheel to Zoom and Orbit.
To Zoom, hover over the 3D preview and use the mouse wheel to zoom in and zoom out.
Interactive UI:
The configurator user interface is fully interactive and you are able to select any option at any time.
The Model Number is also interactive and will update after every selection, although some selections will not cause a change in the model number.
"-MOD" will be added to the end of the Model Number if the configuration does not match a standard Advance Tabco catalog item.
Model Number (optional):
The Model Number text box can be used to quickly set the configurator to Advance Tabco catalog model numbers.
This is not required so you can continue without setting a Model Number and the configurator will automatically select the Model Number based on your inputs.
The PDF button can be used to open the cutsheet for the active model number.
3.1 - Dishtable Type

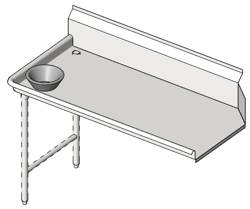
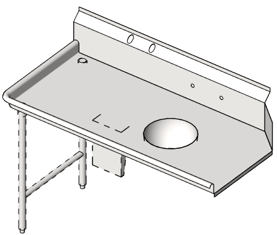
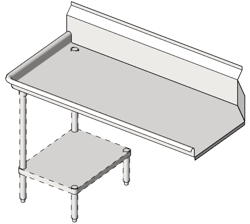
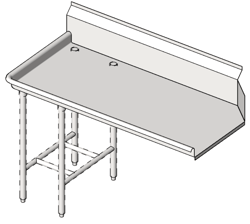
- Clean - A clean dishtable.

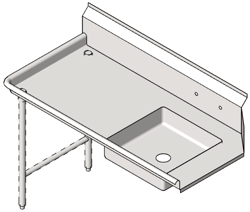
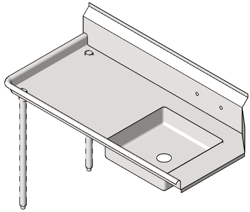
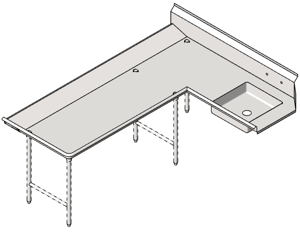
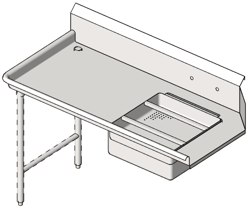
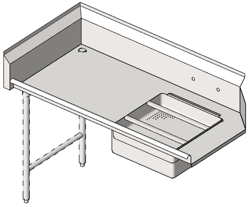
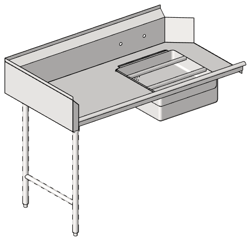
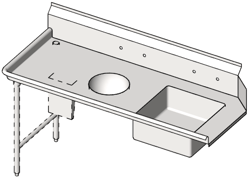
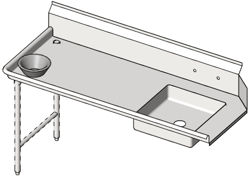
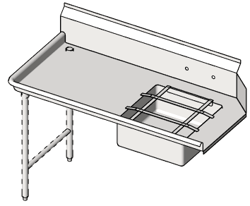
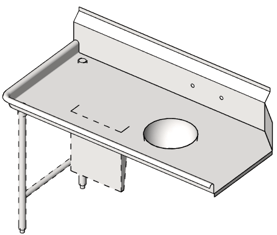
- Soiled (w/ Sink Bowl) - A soiled dishtable with a 20" x 20" pre-rinse sink.

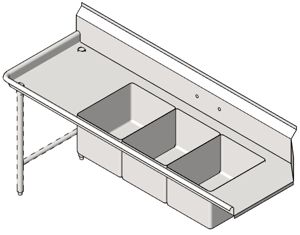
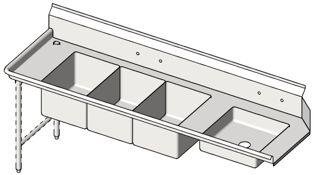
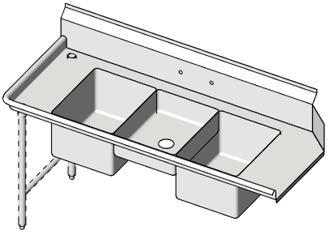
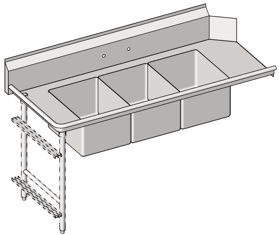
- Clean w/ Compartment Sink(s) - A clean dishtable with a 3-compartment sink.
3.2 - Dishtable Construction

- SpecLine - 14ga SST w/304 SST Legs (30) - SpecLine series. 14 gauge stainless steel and 304 stainless steel legs. SpecLine Soiled dishtables have an 8" deep soiled sink and include a pre-rinse basket. Stainless steel legs include crossbracing.

- Standard - 16ga SST w/STT Leg (70) - Standard series. 16 gauge stainless steel and stainless steel legs. Standard soiled dishtables have a 5" deep soiled sink. Stainless steel legs include crossbracing.
- Supersaver - 16ga SST w/Galv Leg (60) - Supersaver series. 16 gauge stainless steel and galvanized legs. Supersaver soiled dishtables have a 5" deep soiled sink. Galvanized legs without crossbracing.
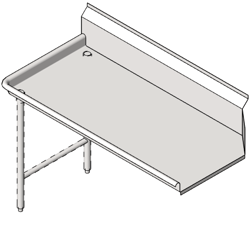
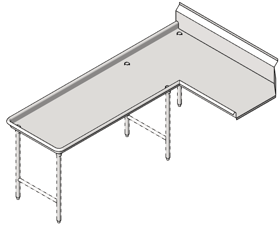
3.3 - Dishtable Shape
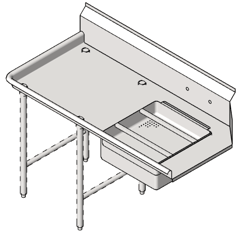
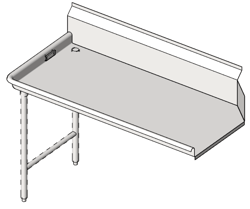
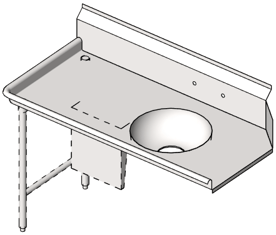
- Straight (S) - Straight dishtables.
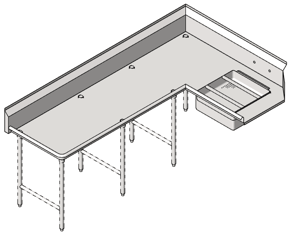
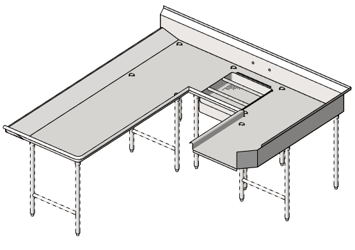
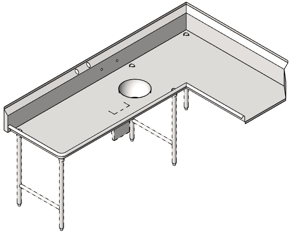
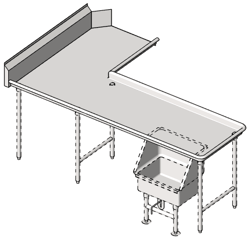
- Corner (K) - Corner dishtables.

- Island (G) - Island dishtables.
- Landing (D) - Landing dishtables contain a soiled dish drop. Only available as Soiled dishtables.
- U-Shaped (U) - U-Shaped dishtables contain a soiled dish drop. Only available as Soiled dishtables.
3.4 - Dishtable Size
The Dishtable Size group changes depending on the Dishtable Shape that is selected. The Create Dishtable tool gives users the ability to change any side of the dishtable and the ability to add a leg set to any side of the dishtable.
Straight Length:
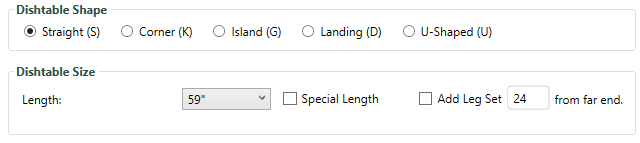
- Length - Use the dropdown to select a standard Advance Tabco size.
- Special Length - To type in a custom size, click the Special Length checkbox and type in the size in the text box that appears and press ENTER (or click outside the text box).
- Add Leg Set from far end - Use this checkbox to add an additional leg set. Use the text box to set the location of the additional leg set in inches from far end. Far end refers to the opposite end of the table from the dishmachine.

Corner/Island/Landing Length:
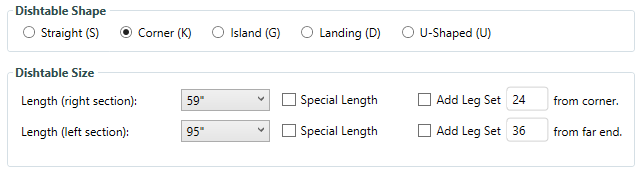
- Length(right section) - Use the dropdown to select a standard Advance Tabco size for the right side of the table.
- Length(left section) - Use the dropdown to select a standard Advance Tabco size for the left side of the table.
- Special Length - To type in a custom size, click the Special Length checkbox and type in the custom size in the text box that appears and press ENTER (or click outside the text box).
- Add Leg Set from corner - Use this checkbox to add an additional leg set on the right side of the table. The text box is used to set the location of the additional leg set in inches from the corner. Corner refers to the outside corner of the dishtable.
- Add Leg Set from far end - Use this checkbox to add an additional leg set on the left side of the table. The text box is used to set the location of the additional leg set in inches from far end. Far end refers to the opposite end of the table from the dishmachine.

U-Shaped Length:

- Length(left/right section) - Use the dropdown to select a standard Advance Tabco size for the left or right side of the table.
- Length(soiled section) - Use the dropdown to select a standard Advance Tabco size for the soiled sink side of the table.
- Length(dishmachine section) - Use the dropdown to select a standard Advance Tabco size for the dishmachine opening side of the table.
- Special Length - To type in a custom size, click the Special Length checkbox and type in the custom size in the text box that appears and press ENTER (or click outside the text box).
- Add Leg Set from far end - Use this checkbox to add an additional leg set on the left side of the table. The text box is used to set the location of the additional leg set in inches from far end. Far end refers to the opposite end of the table from the dishmachine.
- Add Leg Set from corner - Use this checkbox to add an additional leg set on the right side of the table. The text box is used to set the location of the additional leg set in inches from corner. Corner refers to the outside corner of the dishtable.
- Add Leg Set from opening - Use this checkbox to add an additional leg set on the dishmachine side of the table. The text box is used to set the location of the additional leg set in inches from opening. Opening refers to the end of the table with the dishmachine opening.
3.5 - Splash Options

- Turn Down Tile Edge - Turn down the 1" tile edge at the top of the backsplash. Automatically add wall clips.
- Add End Splash - Add an end splash to the far end of the table opposite of the dishmachine opening.
- Close Back of End Splash - Close the back of the end splash to provide a finished end.
3.6 - Clean Dishtable Options
These options are only displayed when Clean or Clean w/ Compartment Sinks is selected.

- Add Disposer - Add a disposer cone with faucet holes, vacuum breaker holes and a disposer control panel. This will also display the Disposer Options where you can change the cone to a collar if a sink is present.
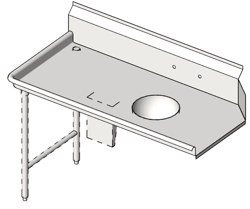
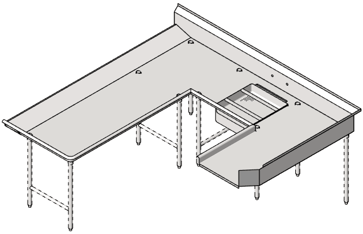
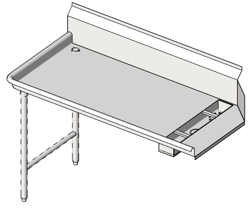
- Add Scrapping Trough - Add a scrapping trough next to the dishmachine opening.
- Add Limit Switch - Add a limit switch to the end of the table. A limit switch is used to stop the dishwasher when a pile up of racks is detected.
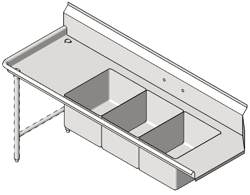
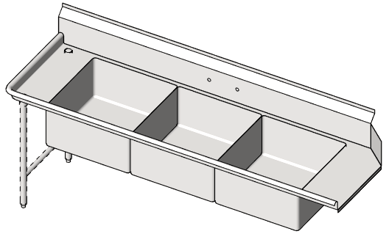
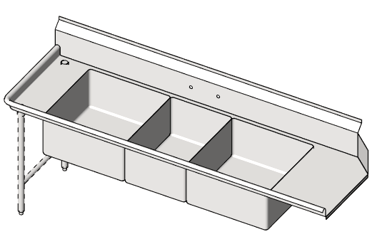
- Add 3-Compartment Sink - Add a 3-compartment sink to the dishtable. This will also display the 3 Compartment Sink Options where you can change the sink of the sinks and add accessories.
- Add Scrap Block - Add a 5-1/2" diameter scrap block and scrap hole in the corner of the table.
3.7 - Soiled Dishtable Options
These options are only displayed when Soiled is selected.

- Add Disposer - Add a disposer cone with faucet holes, vacuum breaker holes and a disposer control panel. This will also display the Disposer Options where you can change the cone to a collar if a sink is present.
- Add Scrapping Trough - Add a scrapping trough next to the dishmachine opening.
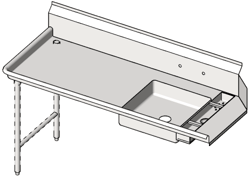
- Add Pre-Rinse Basket - Add a pre-rinse basket to the soiled sink.
- Add 3-Compartment Sink - Add a 3-compartment sink to the dishtable. This will also display the 3 Compartment Sink Options where you can change the sink of the sinks and add accessories.
- Add Scrap Block - Add a 5-1/2" diameter scrap block and scrap hole in the corner of the table.
- Add Pre-Rinse Slide Bar - Add a pre-rinse slide bar to the soiled sink.
- Distance between Soiled Sink and Dishmachine Opening(Not U-Shaped) - Set the distance between the soiled sink and the dishmachine opening.
- Distance from Soiled Sink to Dishmachine Corner (U-Shaped) - Set the distance from the soiled sink to the corner on the dishmachine side of the table.
3.8 - Disposer Options
These options are only displayed when Add Disposer is selected.
- Located on Left or Right - The disposer can be moved to the left or right side when Corner, Island, Landing, or U-Shaped is selected.
- Collar - A disposer collar can be added to the soiled sink or any of the bowls of the 3-compartment sink. This option is not active if no sink is present.
- Cone - Add a disposer cone. This option is selected by default.
- 3-1/2" Sink Adapter - Add a disposer without using a disposer cone or a disposer collar. This option remove the disposer cone or disposer collar but it does not add anything to the dishtable that you will see in the 3D preview.
- Size - Set the disposer cone size to either 12", 15", or 18" using the dropdown.
- Location - Select the location of the disposer cone or the disposer collar.
- Preset locations such as Right Drainboard or In Place of Soiled Sink can be selected.
- To use the Select Custom Location option, set the distance in the Distance from Dishmachine to Cone Center text box.
- Distance from Dishmachine to Cone Center - Set the distance from the dishmachine opening to the center of the disposer cone.
- Control Panel Size - Set the disposer control panel size to either 8" x 12" or 14" x 16".
- Control Panel Location - Set the disposer control panel location to the left or right side of the dishtable when Corner, Island, Landing, or U-Shaped is selected.
- Control Panel Distance from Dishmachine/Corner - Set the distance of the disposer control panel from either the dishmachine opening or the corner of the dishtable depending on the Control Panel Location and shape.
- Add 6" Vacuum Breaker Holes - Add a set of vacuum breaker holes in the backsplash 6" on center.
- Vacuum Breaker Location - Set the vacuum breaker location to the left or right side of the dishtable when Corner, Island, Landing, or U-Shaped is selected.
- Vacuum Breaker Distance from Dishmachine/Corner - Set the distance of the vacuum breaker holes from either the dishmachine opening or the corner of the dishtable depending on the Control Panel Location and shape.
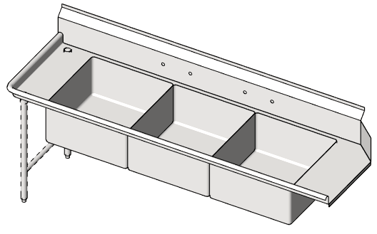
3.9 - 3 Compartment Sink Options
These options are only displayed when Add 3-Compartment Sink is selected.
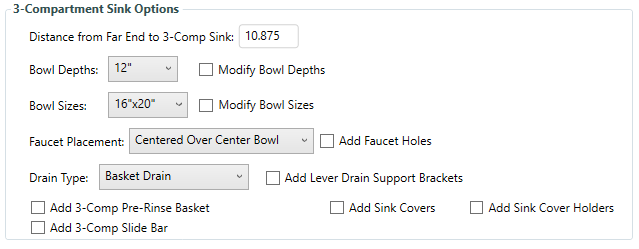
- Distance from Far End/Corner/Landing to 3-Comp Sink - Set the exact location of the 3-compartment sink by setting the distance from the far end of the dishtable, from the corner of the dishtable, or from the start of the landing, depending on which shape is active.
- Bowl Depths - Set the depth of the 3-compartment sink bowls to either 12" and 14" which are the standard sizes offered by Advance Tabco.
- Modify Bowl Depths - Set a custom depth for the 3-compartment sink bowls by using this checkbox and entering the custom size in the text box that appears.
- Bowl Sizes - Set all of the sink bowls of the 3-compartment sink bowls to any of the standard sizes such as 16" x 20", 20" x 20", 18" x 24", or 24" x 24".
- Modify Bowl Sizes- Set each sink bowl size independently using the this checkbox and entering then selecting the size of each bowl in the dropdown that appear.
- Faucet Placement - Set the location of the faucet holes to either Centered over Left Bowl, Centered Between the Left and Center Bowls, Centered over the Center Bowl, Centered Between the Center and Right Bowls, Centered over the Right Bowl.
- Add Faucet Holes - Add a second set of faucet holes by using this checkbox and then selected the location of the second set of faucet holes in the dropdown that appears.
- Add 3-Comp Pre-Rinse Basket - Add pre-rinse baskets to the 3-compartment sink by using this checkbox and then selecting the quantity in the dropdown that appears. This option does not appear in the 3D preview but it is added to the Written Specs.
- Add 3-Comp Slide Bar - Add pre-rinse slide bars to the 3-compartment sink by using this checkbox and then selecting the quantity in the dropdown that appears. This option does not appear in the 3D preview but it is added to the Written Specs.
- Add Sink Covers - Add sink covers to the 3-compartment sink by using this checkbox and then selecting the quantity in the dropdown that appears. This option does not appear in the 3D preview but it is added to the Written Specs.
- Add Sink Covers Holders - Add a sink cover holder to the dishtable. The sink cover holder will be added to one of the leg sets depending on which shape is active.
3.10 - Island/Landing/U-Shaped Options
These options are only displayed when Island, Landing, or U-Shaped is selected.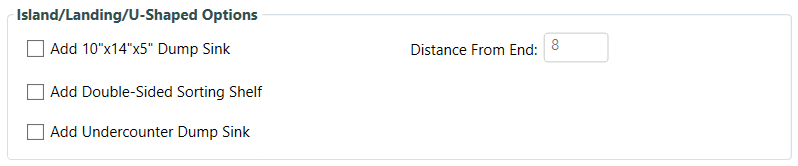
- Add 10"x 14"x5 Dump Sink - Add a 10" x 14" x 5" deep dump sink to the far end of the dishtable. Only available on island, landing, and u-shaped dishtables. Does not include faucet holes.
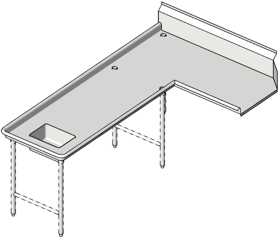
- Dump Sink Distance from End - Use this text box to set the location of the dump sink from the far end of the dishtable.
- Add Double-Sided Sorting Shelf - Add an overhead double-sided sorting shelf to the far side of the dishtable. You must select one of the three styles of sorting shelves.
- Tubular Type 1 - This sorting shelf is constructed of tubular stainless steel and allows dish racks to be flipped over from one side to the other side.
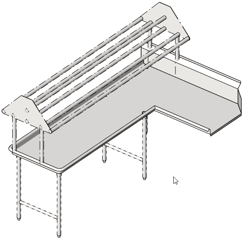
- Tubular Type 2 - This sorting shelf is constructed of tubular stainless steel and can fit dish racks to be placed back-to-back.
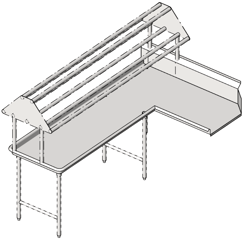
- Solid - This sorting shelf is constructed of stainless steel sheet metal and can fit racks back-to-back.

- Tubular Type 1 - This sorting shelf is constructed of tubular stainless steel and allows dish racks to be flipped over from one side to the other side.
- Add Undercounter Dump Sink - Add a 16"x 20" x 10" deep undercounter dump sink on legs. This sink is attached to the underside of the dishtable.
3.11 - Storage Options
- Add S/S Undershelf - Add a stainless steel undershelf.
- Add Tubular Rack Storage - Add a stainless steel tubular rack storage shelf under the dishtable.
- Modify Size - Use the checkbox to set a custom size in the text box that appears.
- Size - Use the dropdowns to select a standard Advance Tabco size.