
Use the "Show Placement Options" toggle button on the bottom right corner of the Electrical, Plumbing, and Mechanical Settings to set the placement of rough-ins and connection points.
Table of Contents
1. Placement Options
When using the Add MEP Rough-Ins or Add MEP Connection Points tools, you can control where each rough-in and connection point will be placed using the Placement Options.
![]() Click the Show Placement Options toggle button to access the placement settings.
Click the Show Placement Options toggle button to access the placement settings.
![]() When the Show Placement Options button is active you can click it again to return to the family settings.
When the Show Placement Options button is active you can click it again to return to the family settings.

![]() Show Placement Options changes all of the family dropdowns into placement indicator buttons.
Show Placement Options changes all of the family dropdowns into placement indicator buttons.
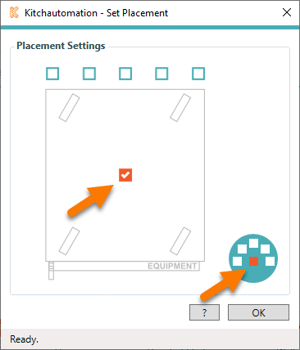
Click on a ![]() button to open the Placement Settings for a particular rough-in.
button to open the Placement Settings for a particular rough-in.
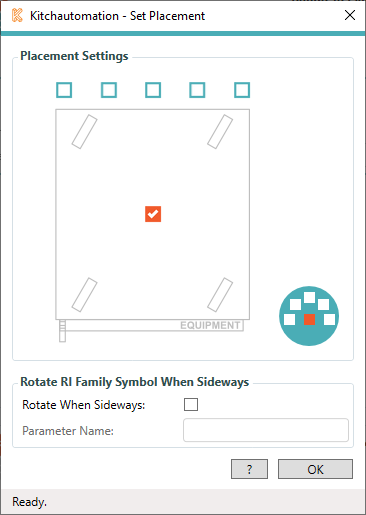
There are three different Placement Settings windows:
One for Floor/Ceiling rough-ins:
Another for Wall rough-ins:
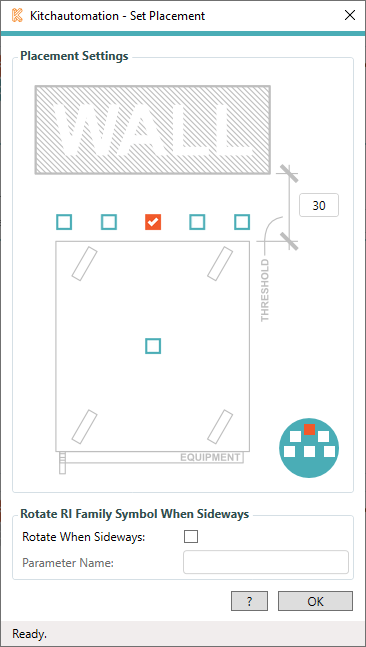
The Wall rough-in placement settings includes a wall image and a threshold dimension.
The THRESHOLD dimension determines whether wall rough-ins placed by this Rule are moved back to be flush with the wall behind the equipment. This field uses inches.
In the above example, if the back of the equipment is less than 30" from the wall then the rough-in will be moved directly back from the selected placement location flush with the face of the wall.
If the back of the equipment is over 30" from the wall then the rough-in will be placed in the selected placement location.
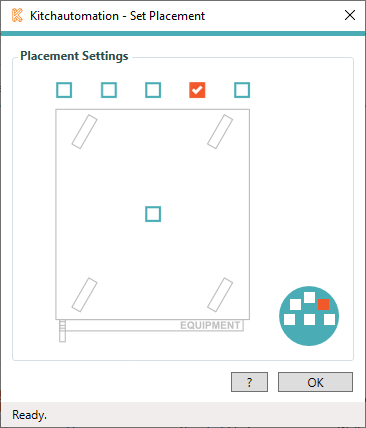
And a third for Connection Points:
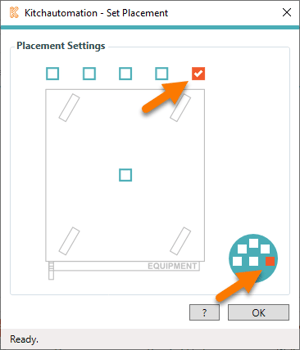
2. Selected Placement Location
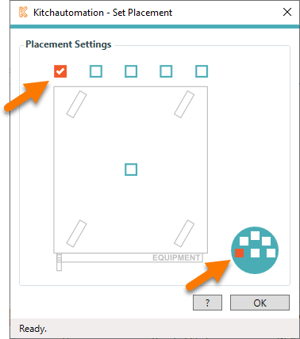
There are (6) possible placement locations. Each of these locations is represented by a checkbox.
When specifying the Wall rough-in placement, keep in mind that all placement locations will be moved to the face of a wall including the center-center placement.
The default placement location is the center-center of the equipment family.
The Show Placement Options icon also shows the selected placement location.
The placement options icons are also visible from the Settings. ![]()
![]()
![]()
![]()
![]()
![]()
The other locations are back left.
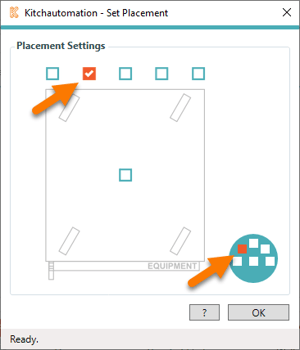
Back center left
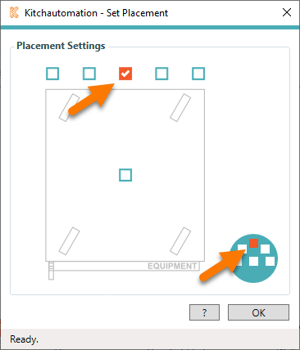
Back center
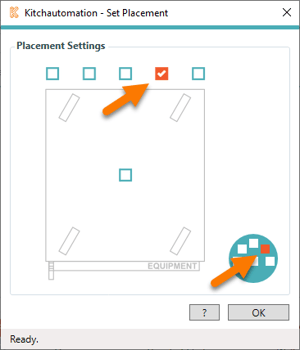
Back center right
Back right
3. Show Rotated Symbols When Sideways
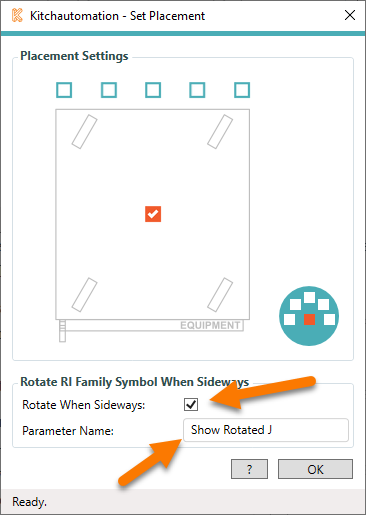
For anybody that uses letters in their rough-in symbols, we have added a special feature to rotate the letter when the rough-in is placed sideways.
To use this feature, add a Yes/No visibility parameter to your rough-in family and specify that parameter in the Rotate When Sideways group of the Show Placement Options window.

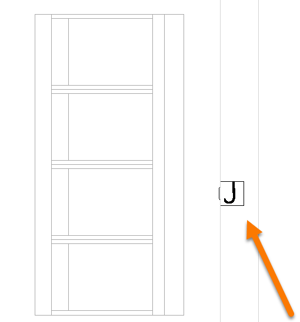
Associate this parameter with a 90 degree rotated letter inside your rough-in family and when a rough-in is placed sideways, the Yes/No parameter will be checked by the Add Plumbing Rough-Ins tool.
The result is your letter symbols always sitting upright.