This tool creates Special Conditions, Electrical, Plumbing, and/or Mechanical plan views by duplicating your Equipment plan, renaming, and adding View Templates . Views can then be placed onto predefined sheets in alignment with your Equipment plan.
Table of Contents
- Getting Started Video
- Setting Up the Create|Place MEP Views tool
- Using the Create|Place MEP Views tool
3.1- Create MEP Views
3.2-Create MEP Views and Replace Placeholder Views
3.3- Place MEP Views
3.4- Unlock Grayed Out Views
1. Getting Started Video
2. Setting Up the Create|Place MEP Views tool
The Create|Place MEP Views tool requires view templates to be specified in the Settings. View templates are required so they can be applied to the newly created views.
It also requires the default Sheet Numbering to be set in Settings>Project.

Click on the Settings button.
The Settings window opens to the Project tab.
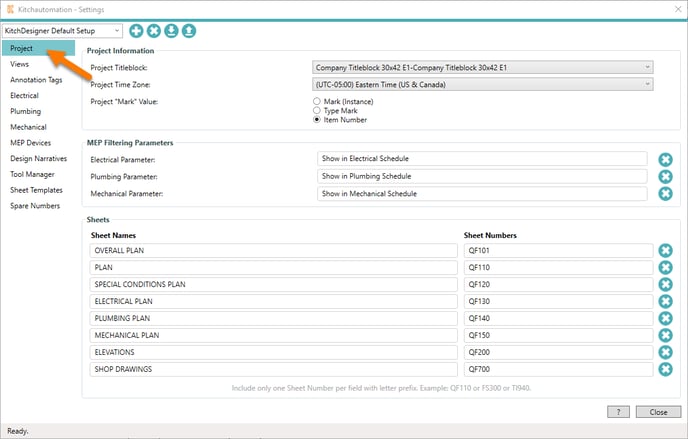
In the Sheets group, specify the starting sheet number for the Equipment Plan, Special Conditions Plan, Electrical Plan, Plumbing Plan, and Mechanical Plan. The sheet numbers will be used by the Create|Place tool as the starting sheet numbers for new views to be placed on.
Next go to the Views tab.
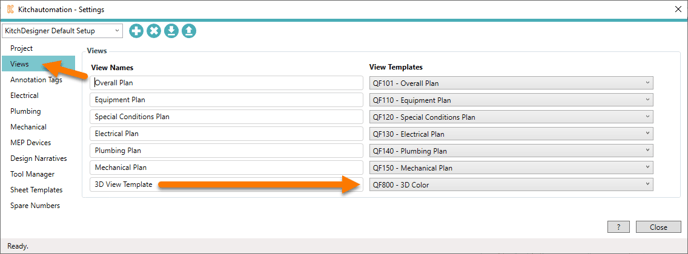
Specify the view templates using the dropdowns.
Edit the view template names to rename the views. These names are used in the Create|Place MEP Views tool as the names of the newly created views.
The Create|Place MEP Views tool requires views templates to be specified for each view type you want to create.
3. Using the Create|Place MEP Views tool

Click on the Create|Place MEP Views button.
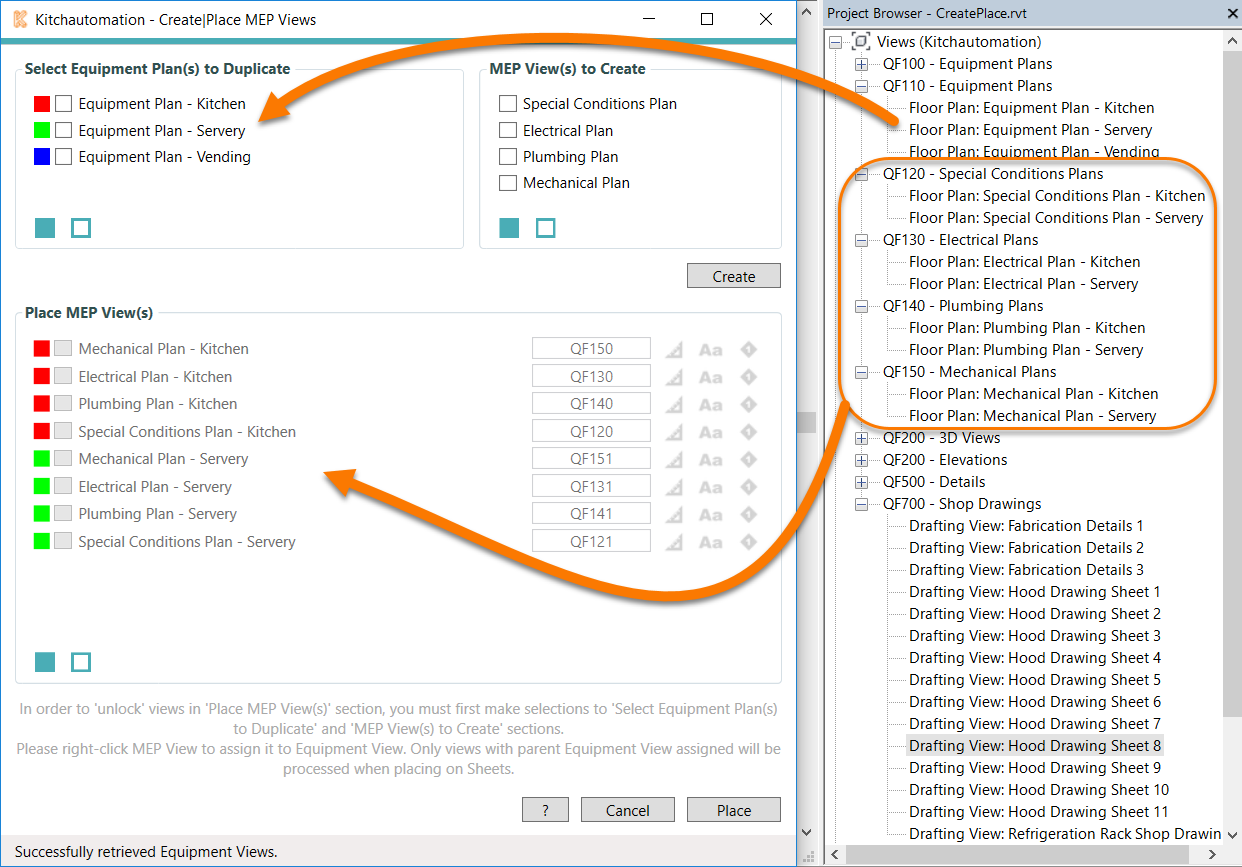
The Create|Place MEP Views window is separated into (2) sections, the top section is the Create section and the bottom section is the Place section.
The top left section will display all of the Equipment Plan views in your model on the left. The views all have the Equipment Plan view template that you specified on the Views tab.
The bottom section will display all of the MEP views in your model that are set to the view templates that you specified on the Views tab.
3.1- Create MEP Views
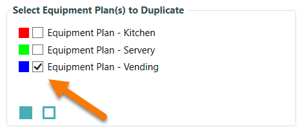
First, select an Equipment Plan to Duplicate.
All views that contain the Equipment Plan view template specified in Settings will appear in this group.
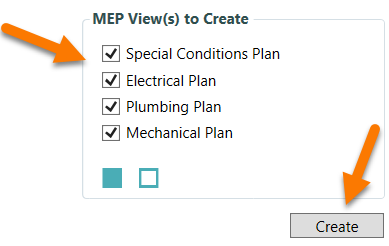
Next, select the MEP View(s) to Create
Each view can be renamed in Settings to any name of your choice.
MEP Views must have a view template specified to be active and selectable.
 To create the MEP views, click the Create button.
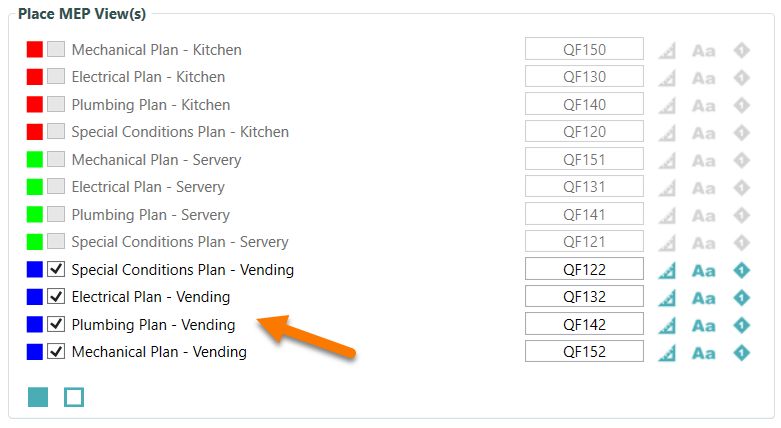
The new views that are created will appear in the Place MEP View(s) section.
- New views are named by replacing "Equipment Plan" in the original name with the view name.
- New views are given a sheet number not currently in use by another MEP view.
- Starting sheet numbers are specified in Settings and are incremented by 1 for each new view.
3.2- Create MEP Views and Replace Placeholder Views
The Create|Place tool can also be used to replace placeholder MEP views.
Next to each sheet number are (3) indicators used to determine if the view(s) can be replaced.
- The triangle indicator means the view contains dimensions.
- The text indicator means the view contains text notes.
- The tag indicator means the view contains annotations tags.
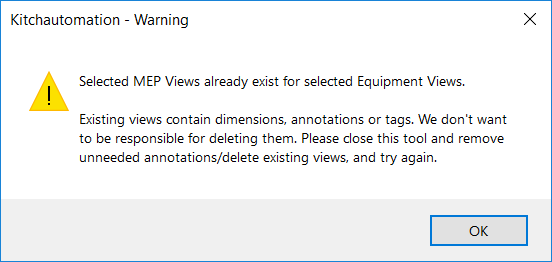
If you attempt to create MEP view(s) that already exist and any of the (3) indicators are present, then this pop-up message will appear.
If you would still like to replace these views you will need to manually delete them.
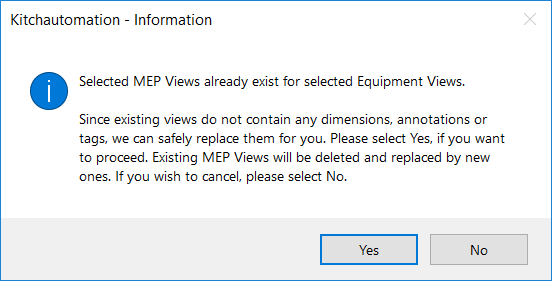
If you want to create new MEP view(s) to replace placeholder MEP view(s) and none of the (3) indicators are present, this message will appear and give you the option.
- Select Yes to replace existing views with new views. Existing views will be deleted.
- Select No to cancel.
3.3- Place MEP Views
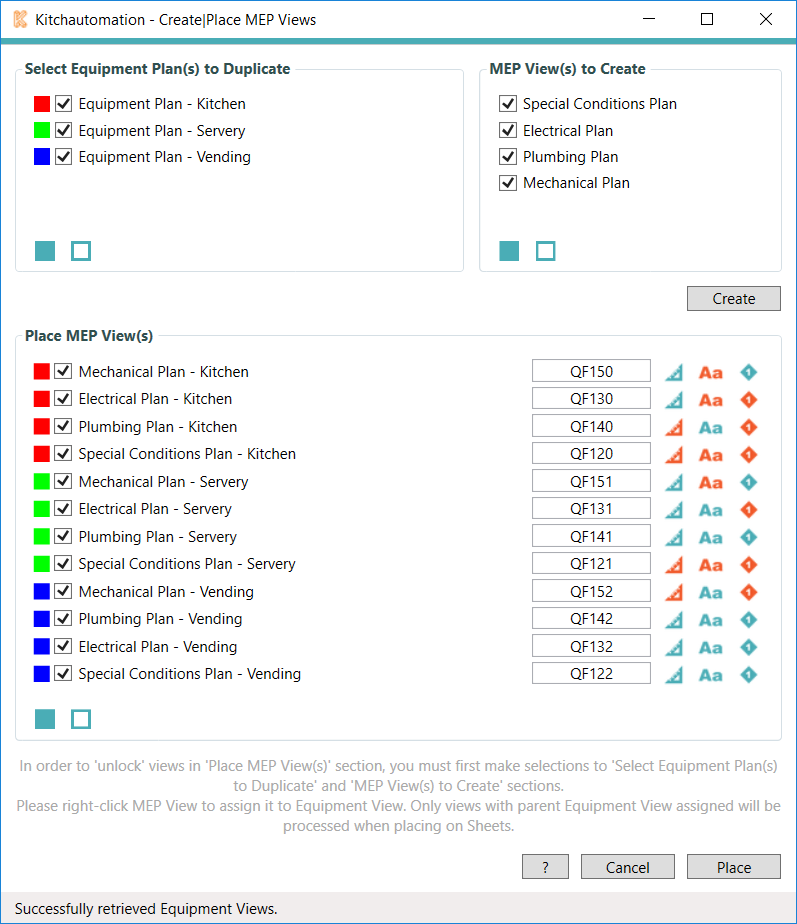
The Create|Place tool can place MEP view(s) onto sheets and align those views to their respective Equipment plans so each set of sheets looks uniform.
Each view must have a sheet specified in the Place MEP View(s) section in the same row as the view.
 Each view is also linked to an Equipment Plan using a common color block. This link determines where the view is placed on the sheet. They are placed in the identical location as the linked Equipment Plan view.
- When the Create|Place tool is launched, Equipment Plans and existing MEP views are matched using their names and color blocks are added.
- Color blocks can be changed by right-clicking a view and selecting a new color block. This will re-link a view to a different Equipment Plan view which would result in that view being placed in a different location on the sheet, but still on the sheet specified.
 Click the Place button to place the selected views.
3.4- Unlock Grayed Out Views
To unlock, or activate grayed out views in the Place section, select the Equipment Plan and MEP Views in the Create sections. This will activate the views in the Place section so you can select them to be placed.

